14 Ways to Improve Your Next Video Project

Many marketers want to get into video, (and they should) but find the entire process daunting. You can quickly get overwhelmed with decisions such which camera to use, how to get good quality audio and what kind of editing software to implement. Well, I’m here to tell you that it’s going to be okay. So take a deep breath, take my hand, and follow me as we walk together through a crash course of some ways to improve your next video content project.
Video Content Pre-Production
1.What is your goal?
So, you decided to make a video. Great! Now you have to ask yourself “why?” Do you want your audience to visit a website? Create an experience to bring your audience closer to your brand? Showcasing a new product? Video is an incredible tool, but you have to ensure that it’s the right tool. Making a video for the sake of making a video is generally unsuccessful. Always start your concept with a single purpose in mind. This purpose will help guide you when making decisions throughout the entire process.
Pro Tip: “To go viral” is not a goal.
2. Create a Storyboard
The best video content doesn’t just happen. They are a product of meticulous concepting and preparing.
I know you’re itching to use that camera. I am, too. Don’t worry, we will get there. First, you need to know what you are shooting. The storyboard can achieve this. The storyboard is a visual representation of all of the shots you want to see in your video content project.
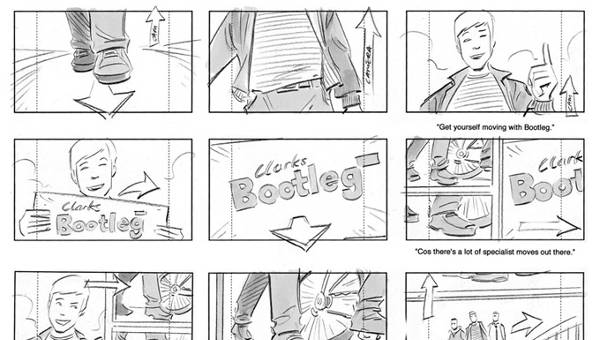
If you are not familiar with storyboards, think of the panels in a comic book. You don’t need to be an artist to make them – stick figures are fine. The storyboard is there to give you a sense of timing for your video content, and how many shots that will be needed.
The more time you spend preparing your video content, the less likely it is to run into problems.
3. Know your format
With a storyboard firmly in place, you are nearing the production phase. But first you need to decide the best format for your video content.
Thanks to social media, video can live in a number of places now. A video may look incredible on your website, but that same video might look very different playing on Instagram or Twitter. Will the sides of your get cut off when playing in Snapchat? Should you shoot your video vertically for Facebook? (I’ll actually answer that one right now: No. No, you should not).
Knowing where and how your video content will be played is a crucial step when planning your video.
Video Content Production
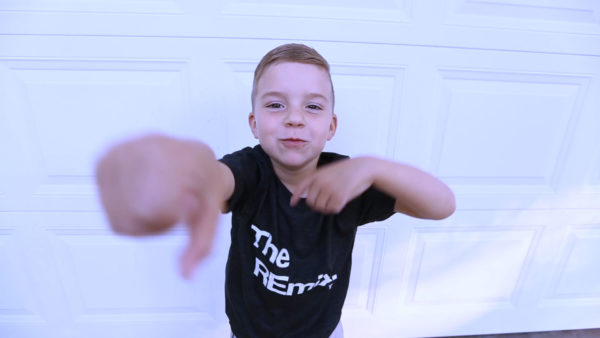
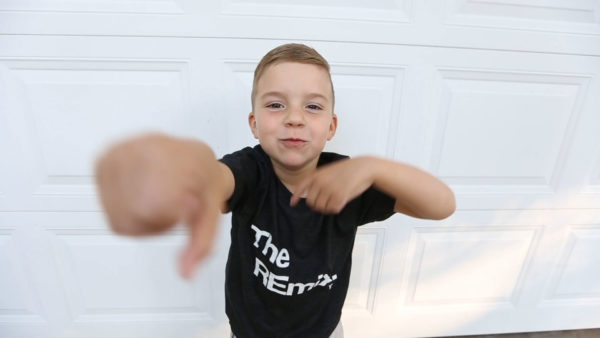
4. Rule of thirds
Whenever shooting video (or taking photos), remember the “Rule of Thirds.” What is the “Rule of Thirds” you ask? Imagine your shot is divided into nine equal sectors by two horizontal lines and two vertical lines shown here:

Notice how the subject is intersecting two of the four points? This technique is used to focus on the main points of interest in the shot. This is a pretty tried and true method when composing your shots. It makes your shot more aesthetically pleasing overall.
Pro Tip: Though this technically is a rule, there are no rules in video.
5. Color Temperature
We are now approaching one of my personal favorite topics: Color. In video, different kinds of light have different color temperatures. These temperatures are measured in Kelvin degrees.

You will notice from the picture above–different light sources can shift the color of your shot ranging from warm (red) to cool (blue) temperatures. This will affect the look of your shot, but since this is a crash course, I would just recommend not using multiple light sources with different temperatures.
Let’s say you are shooting in a room with a large window in it, and you are lighting your subject with fluorescent lights. Depending on where your subject is, the daylight, which has a temperature around 5600°, might be mixing with your florescent light, which has a temperature around 4500°. This kind of light mixing is unappealing and can become a headache in post-production.
Just make sure your primary light is consistent and even. For indoor shoots, you can’t go wrong using a light kit and turning off or blocking all other light sources. For outdoor shoots, you can’t go wrong using the sun and reflectors.
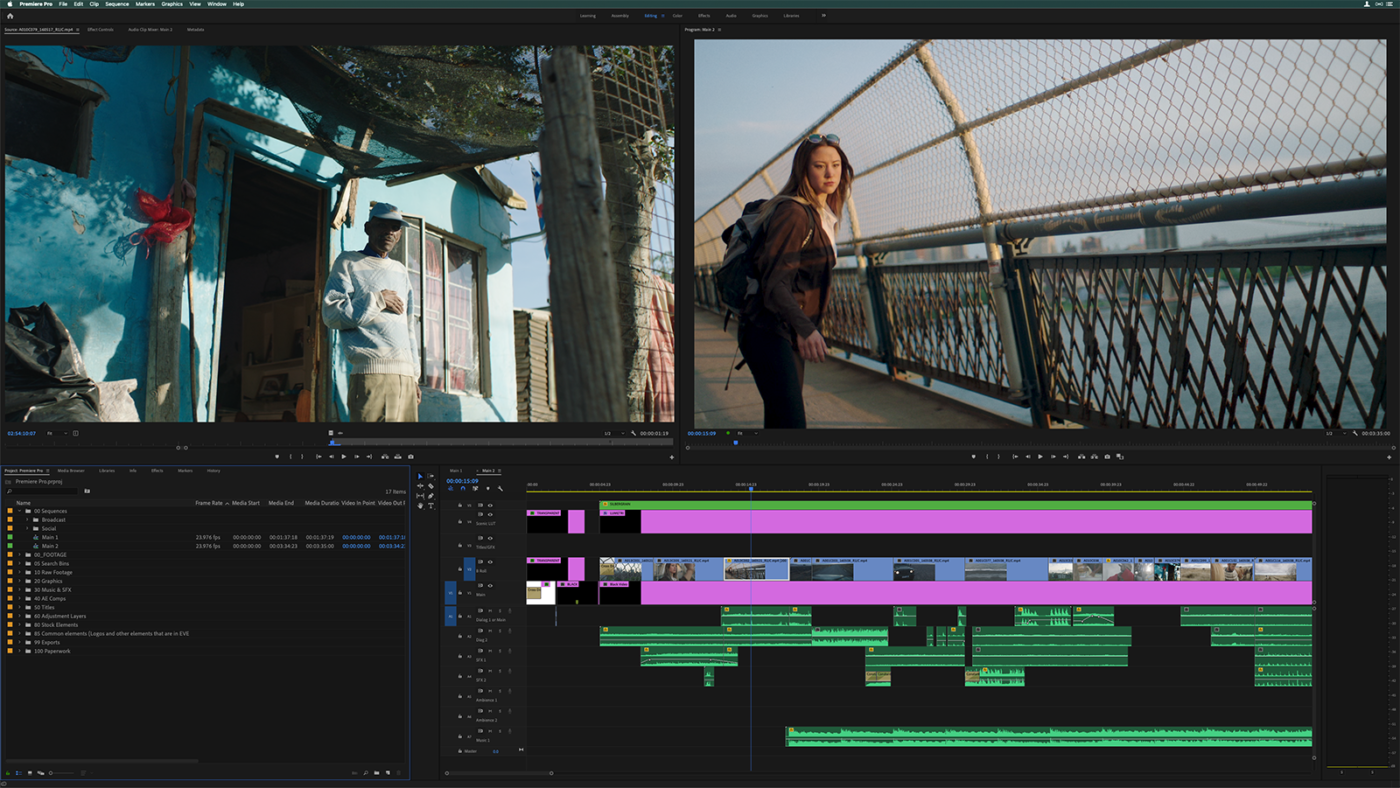
6. White Balancing
Our human eyes do an amazing job of telling our brain what is white, and our brains adjusts our visual sense accordingly, automatically and in milliseconds. Video cameras, unfortunately, do not have that luxury. Knowing now that different light sources have different color temperatures, we need to tell the camera what “true white” looks like in an environment to avoid color casting.
In this image, the blue shot on the left was caused by the natural temperature of the daylight in the shot. The image on the right has been balanced correctly to give a more natural look.
7. Lighting
Don’t just point your light at your subject. This can lead to a number of problems including blowing out your brightness and contrast of your shot, and unflattering reflections on your subject. If possible, use a reflector or a diffuser to evenly light your subject instead.
8. Audio
Audio can make or break a video. Before filming, check for the noise levels at the location where you are shooting. Any feint noise can be picked up by your audio equipment and is a big pain to fix in post (if it’s even possible).
Ensure that your location is relatively quiet and avoid spaces that produce a lot of echoes.
9. Alt Takes
When shooting, have your talent run through multiple takes. Even if you think that first take was perfection, shoot another one. You may notice things in post that you didn’t on the day of the shoot and having another shot to fall back on is much preferred over a reshoot.
Video Content Post-Production
10. Organize
Here is where the magic begins. Once you have all of your memory cards copied and imported into your favorite non-linear editing program (Adobe Premiere fan-boy here), it’s time to edit. But before playtime, you have to clean up first.
I like keeping interviews on one timeline, using in and out points to cut out unneeded clips from talent. I also like to create folders for each scene/location for quick navigation. Anything you can do to make you cut faster in post, is a great boon.
11. Rough Cut
Now it’s time to put all of those clips you recorded together and piecing together a video version of your storyboard. Your initial cut with reveal your video content’s timing and any needed pick-up shots. Your rough cut won’t be impressive at first, but it will give you an idea of which areas need the most work.
12. Transitions and Effects
They are cool. They are flashy. And they are awesome….in moderation! Your non-linear editing software no doubtable has included a number of packaged effects and transitions for you to use at free will. That star wipe is tempting, but great video content rarely relies on cheesy effects and transitions. Instead, stick to the classics: simple cross fades, and dips to black.
13. Music
Not every video uses music, but if you do, make sure it fits the theme and the story that you are trying to tell with your video content.
Also, just because you purchased an .mp3 does not mean you can use it in your video! Unless you use royalty-free music or compose your own, most music is copyrighted and may not be used without permission.
Luckily, there are a lot of sites out there that provide some royalty-free music for a small price. Here are some of my favorites:
14. Rendering
Wow – we made it. Your video has been meticulously cut together, and you are satisfied with the final result. Time to hit ‘Render’.
Rendering is a slippery slope. Too small of a file, and your video might look blocky or sound muffled. Too big of a file might look amazing but takes way too long to load online. I recommend using MP4’s with the H.264 codec and playing with your render settings to find a happy medium. H.264 MP4’s currently works great with PC and mobile, as well as all of the major social media sites.
Well, we did it. Thanks for accompanying me on the journey. Hopefully you learned something along the way. If you have any questions, feel free to shoot me a message and we can talk about taking your next video content project to the next level.